
Help Center
Sub-Account Setup Guide
Create and manage client workspaces, invite users, configure roles, and navigate between accounts.
Last updated
Sub-accounts are client workspaces in Seedly CRM. Each sub-account is isolated - it has its own contacts, conversations, pipelines, workflows, invoices, and settings. Data from one sub-account is never visible from another.
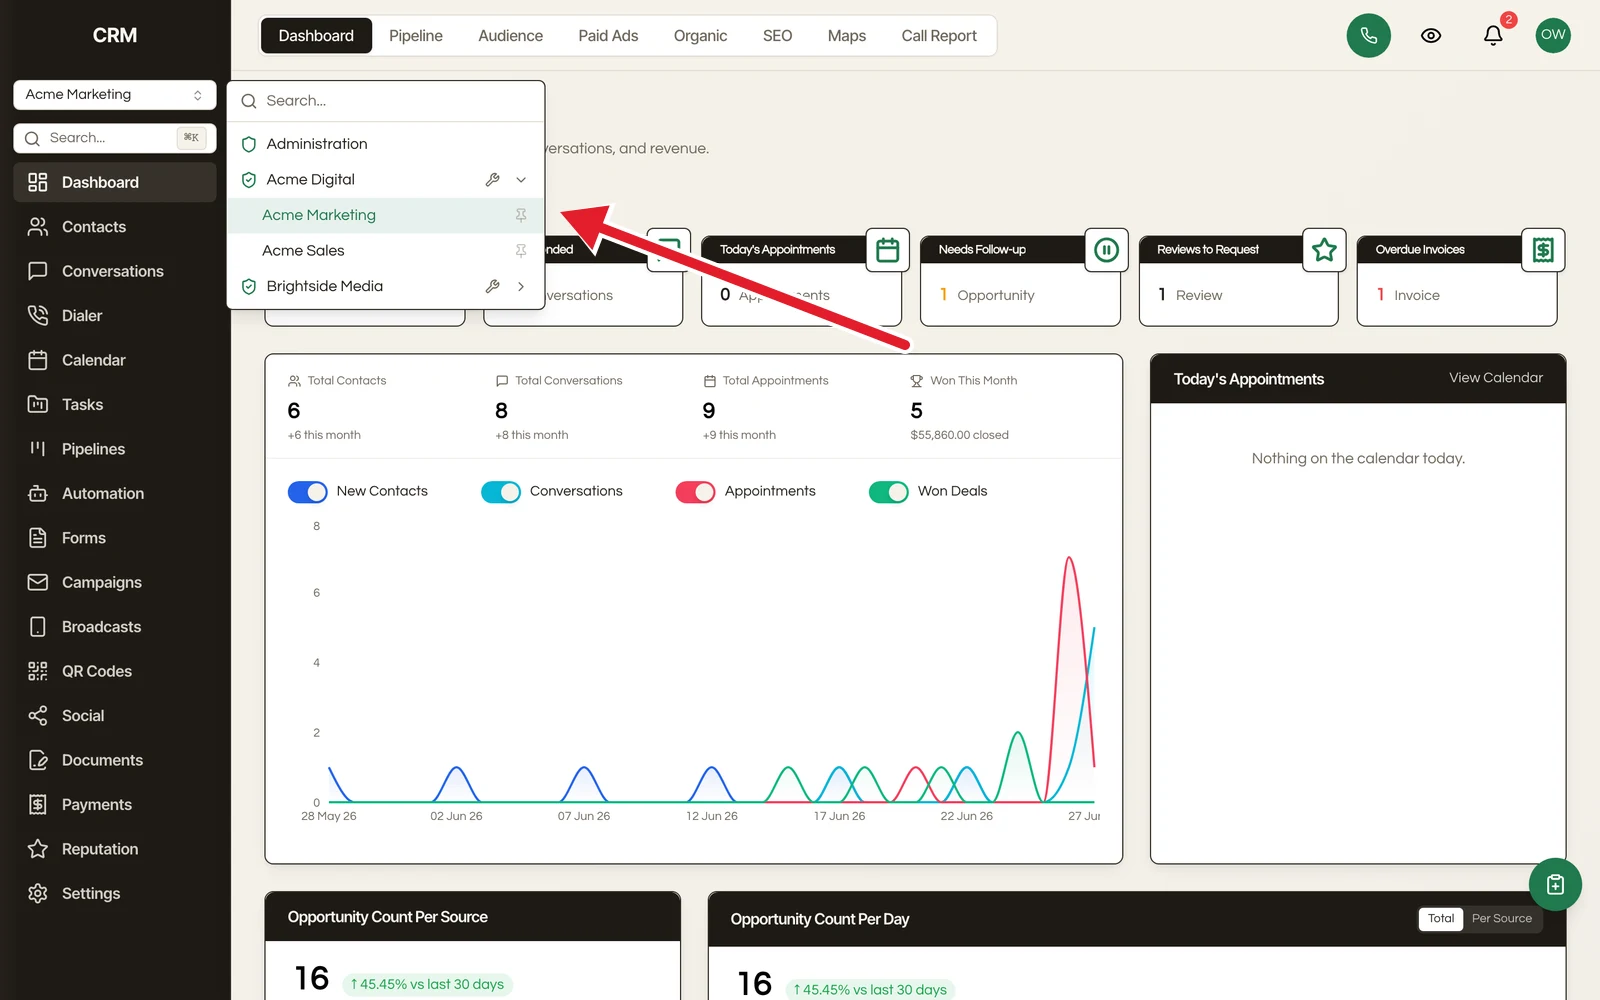
This page covers creating sub-accounts, managing users and roles, and switching between accounts.
How Sub-Accounts Are Organized#
Seedly CRM uses a three-tier hierarchy:
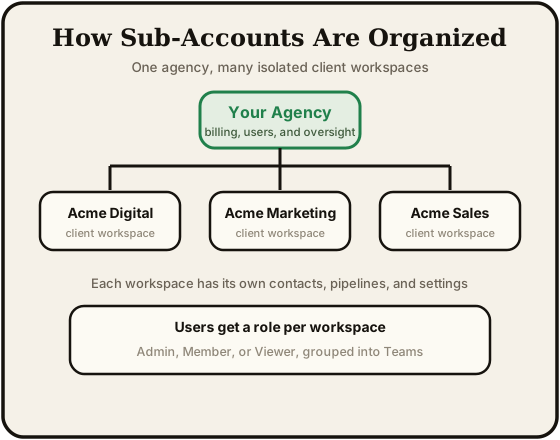
Agency
  └── Brand
└── Sub-Account (one per client)- Agency - The top-level entity. Your agency owns the entire installation and has visibility across all data.
- Brand - An organizational grouping within the agency. Brands can have their own branding, billing schedules, and integration credential overrides. If you only operate under one brand, a default brand is created automatically.
- Sub-Account - The working unit. Each sub-account represents one client and contains all of that client's data. Sub-accounts are strictly isolated from each other.
Sub-Account Types#
There are two types of sub-accounts:
Admin Sub-Account#
Every brand has one admin sub-account, created automatically when the brand is set up. The admin sub-account:
- Cannot be deactivated or cancelled - it is always available
- Works identically to a standard sub-account - it has its own contacts, pipelines, workflows, conversations, and all other features
- Controls credential cascade - it determines which integration credentials (SMS providers, email providers) are available to standard sub-accounts within the brand
The admin sub-account is your brand's own operational workspace. Use it for your agency's internal work or as a sandbox for testing workflows before deploying them to client accounts.
Standard Sub-Account#
Standard sub-accounts are created for each of your clients. They operate independently - each account manages its own settings, phone numbers, email domains, and integrations. Brand settings do not automatically cascade to standard sub-accounts.
Creating a Sub-Account#
- Navigate to Settings → Sub-Accounts
- Click Create Sub-Account
- Enter a Name for the sub-account (required) - this is the display name your team will see
- Optionally enter a Slug - a URL-friendly identifier. If left blank, one is generated automatically from the name
- Click Create
The new sub-account is assigned to your currently active brand.
Things to Know#
- The slug cannot be changed after creation - choose carefully if entering a custom one
- Only the name can be edited later
- You need the Sub-Accounts → Create permission to create new accounts
Sub-Account Lifecycle#
Sub-accounts move through these states:
| State | What It Means |
|---|---|
| Active | Normal operation - fully accessible to all assigned users |
| Suspended | Temporarily blocked - data is preserved but all access is paused. Agency owners and brand admins can still manage the account |
| Deactivated | Soft delete - data is preserved but non-admin users lose access. Can be reactivated |
| Cancelled | Permanently closed - data is preserved for a retention period |
Managing Lifecycle#
- Deactivate: Click the Deactivate button on a sub-account card. A confirmation dialog explains what will happen. Data is never deleted - deactivation only blocks access.
- Suspend / Resume: Suspending pauses all access temporarily. Resuming returns the account to active. Useful for billing holds or compliance situations.
- Cancel: Permanent closure. Confirm carefully before proceeding.
Admin sub-accounts cannot be deactivated, suspended, or cancelled.
User Roles#
Seedly CRM includes four built-in system roles, arranged in a strict hierarchy:
| Role | Scope | What They Can Do |
|---|---|---|
| Agency Owner | Full agency + all sub-accounts | Unrestricted access to everything - billing, plans, system configuration, all sub-accounts. An agency owner cannot be locked out of a sub-account they own (removing their own membership no longer leaves them unable to re-enter). |
| Brand Admin | Brand + its sub-accounts | Manages all sub-accounts within their brand, including branding, billing schedules, and integration overrides |
| Sub-Account Admin | Single sub-account | Full control within their assigned sub-account - user management, settings, and all modules |
| Sub-Account User | Single sub-account | Day-to-day permissions controlled by their role assignment |
Custom Roles#
You can create custom roles at the agency level or sub-account level. Each custom role defines exactly what a team member can and cannot do, across 35 modules with four actions each (view, create, update, delete).
To speed up role creation, start from a template:
| Template | Description |
|---|---|
| Full Access | All permissions on all modules |
| Admin (No Billing) | Full access except billing and plan management |
| Sales Rep | Contacts, pipelines, conversations, tasks, and calendar - no settings or admin |
| Standard | Common day-to-day permissions for most team members |
| Limited | Read-only access with create/edit only on assigned records |
Creating a Custom Role#
- Navigate to Settings → Access
- In the Roles section, click New Role
- Enter a Name and optional Description
- Choose a Level - Agency or Sub-Account
- Select a Template to start from, or configure permissions manually
- Use the tab navigation (CRM, Sales, Marketing, Finance, Administration) to review permissions by category
- Toggle individual permissions as needed - each module has checkboxes for View, Create, Update, and Delete
- Click Save
Scope Control#
For each permission, you can also set a scope that controls which records the user can access:
| Scope | What It Means |
|---|---|
| Own | Only records assigned to the user |
| Team | Records assigned to anyone on the user's team |
| All | All records in the sub-account |
For example, a sales rep might be able to view all contacts but only edit the ones assigned to them.
Privilege Escalation Prevention#
Users cannot create or assign a role that is equal to or higher than their own. This is enforced at the backend and cannot be bypassed.
Inviting Users#
Sending an Invitation#
- Navigate to Settings → Access
- In the Users section, click Invite User
- Enter the user's Email Address
- Select a Role from the dropdown
- If you are an agency-level user, choose which Sub-Accounts the user should have access to. Sub-account admins inviting within their own account skip this step - the user is automatically assigned to the current sub-account
- Click Send Invitation
What Happens Next#
- New user: An invitation email is sent. The invitee has 7 days to sign up. When they create their account, they are automatically added to the sub-account with the assigned role.
- Existing user: If the email matches someone who already has an account, they are added immediately - no invitation email or waiting period.
Inviting Several People at Once#
Paste or enter multiple email addresses to invite a group in one pass, with the same role and the same sub-account access applied to all of them. Each person still gets their own invitation.
If an invitation email cannot be delivered, the invitation says so rather than appearing to have been sent. That matters because the invite itself is still valid: you can pass the person their link another way instead of waiting on an email that is never going to arrive.
Managing Invitations#
Pending invitations appear below the users table. For each invitation you can see the email, who sent it, the assigned role, and whether it has expired. Click Revoke to cancel a pending invitation.
You only ever see invitations for sub-accounts you have access to.
Finding People in Long Lists#
Anywhere you pick a team member, assigning a conversation, @mentioning someone in a note, choosing an owner, the picker is searchable. Type part of a name to filter. On a large team this is the difference between a usable list and one that quietly stops short of everyone.
Copy Permissions#
To quickly match one user's access to another:
- Click Copy Permissions above the users table
- Select the source user (copy from)
- Select the target user (apply to)
- Click Copy Permissions
This clones the source user's role assignment to the target user.
Teams#
Teams let you group users for scope-based access control. When a permission scope is set to "Team", users can access records assigned to anyone on their team.
Creating a Team#
- Navigate to Settings → Access
- In the Teams section, click New Team
- Enter a Name and optional Description
- Search and select Members from your active users
- Click Save
A user can belong to multiple teams. Team membership affects which records they can see and edit when their role uses "Team" scope.
Switching Between Sub-Accounts#
If you have access to multiple sub-accounts, use the account switcher in the sidebar to navigate between them.
How to Switch#
- Click the account name in the sidebar (near the top)
- A popover opens showing all sub-accounts you have access to
- Search by name using the search bar at the top
- Click a sub-account to switch to it
The switch is instant - all modules (contacts, pipelines, conversations, and everything else) immediately reflect the selected account's data. No page reload is needed.
You can be in one sub-account at a time. If another browser tab or device switches to a different sub-account while a page is open, that page shows a message saying the workspace is open somewhere else, with Use it here and Leave this page. Whatever you had open underneath, such as a half-typed reply, is left as it was.
Identifying Accounts#
- Admin sub-accounts are marked with a shield icon and grouped at the top
- Pinned accounts appear next - click the pin icon on any account to add it to your favorites
- Standard accounts are listed below
Pin your most-used accounts so they are always easy to reach.
Summary#
| Capability | Detail |
|---|---|
| Sub-account types | Admin (1 per brand, auto-created) + Standard (1 per client) |
| Lifecycle states | Active, Suspended, Deactivated, Cancelled |
| Data isolation | Complete - no cross-account data access |
| System roles | 4 (Agency Owner, Brand Admin, Sub-Account Admin, Sub-Account User) |
| Custom roles | Unlimited, at agency or sub-account level |
| Role templates | 5 (Full Access, Admin No Billing, Sales Rep, Standard, Limited) |
| Permission modules | 35 |
| Actions per module | 4 (view, create, update, delete) |
| Scope options | 3 (own, team, all) |
| Invitation expiry | 7 days |
| Account switching | Instant, with search and pin-to-favorites |