
Help Center
Calendar & Booking
Create appointment types, manage availability, and share booking links with clients.
Last updated
The Calendar module lets you create appointment types, define your availability, and share booking links so clients can schedule time with you. Appointments are tracked and linked to contact records automatically.
Calendar View#
The calendar page shows your appointments in a visual calendar. Switch between day, week, and month views using the controls at the top. Navigate forward and backward by date.
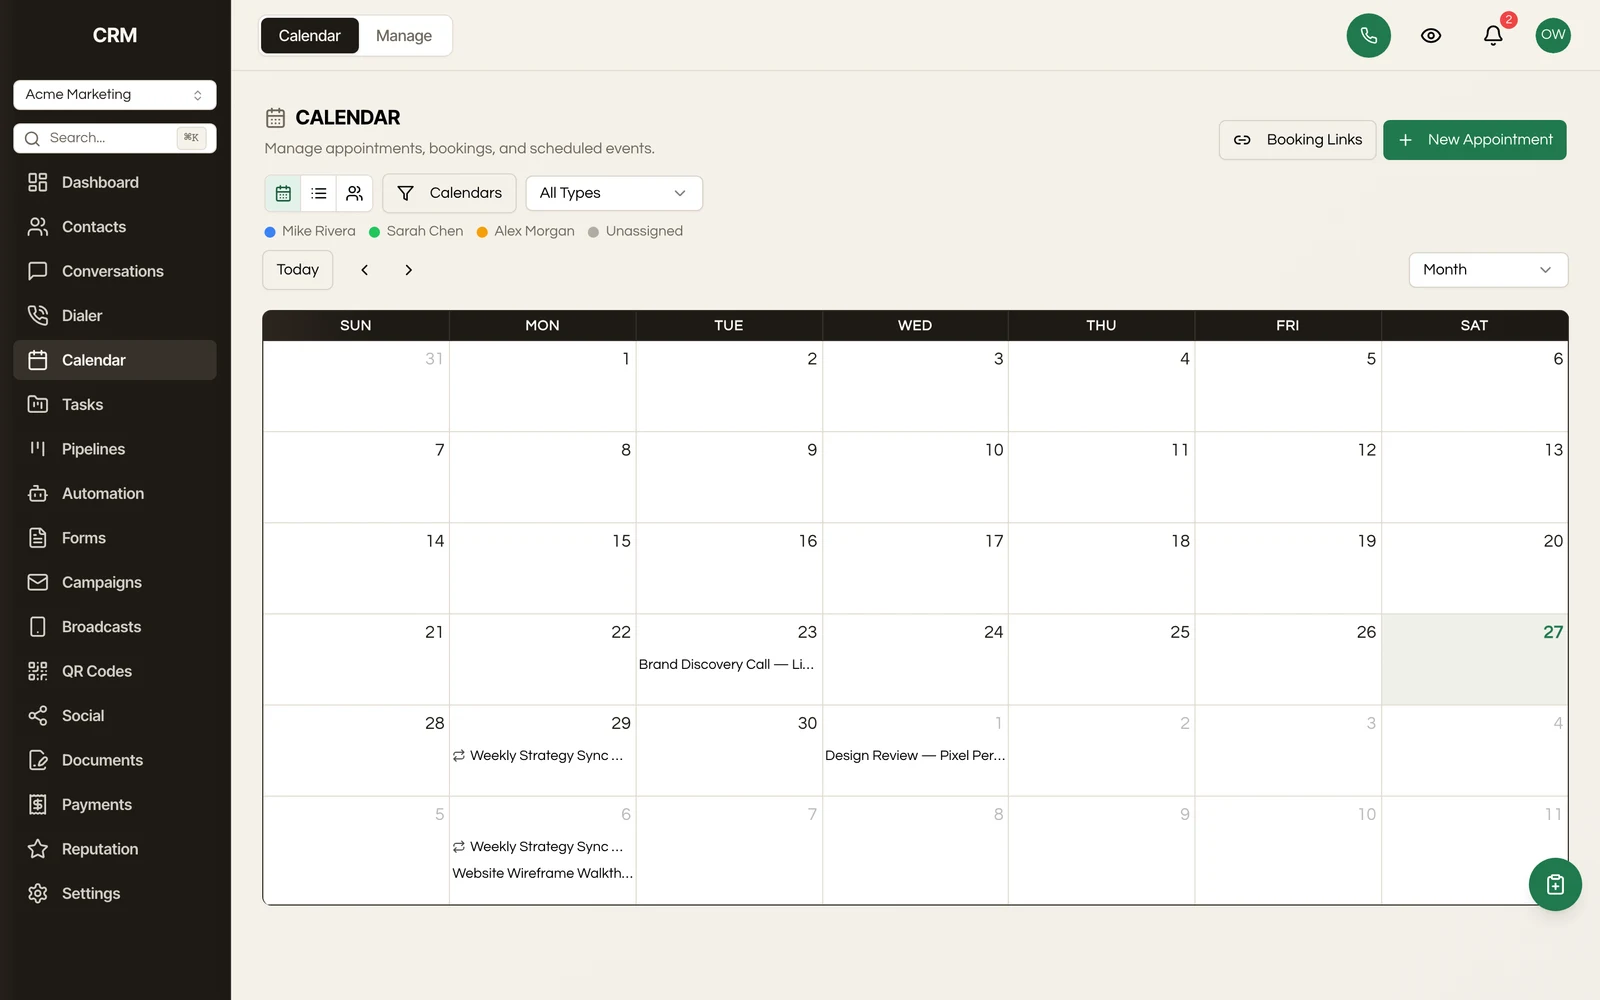
Each appointment block shows the contact name, appointment type, time, and status.
Appointment Types#
Appointment types define the kinds of meetings you offer - for example, "Discovery Call," "Strategy Session," or "Onboarding."
Creating an Appointment Type#
- Click New Appointment Type
- Fill in the details:
| Field | Description |
|---|---|
| Name | What the appointment is called (visible to clients on the booking page) |
| Duration | Length of the appointment in minutes |
| Description | Optional details shown on the booking page |
| Location | Where the meeting happens - in person, phone, or video link |
| Color | Calendar color for this appointment type |
- Configure availability (see below)
- Click Save
Groups#
Organize appointment types into groups - for example, "Sales Meetings" and "Support Sessions." Groups appear as sections on the booking page when you offer multiple appointment types.
Availability#
Define when you are available for each appointment type.
Setting Available Hours#
- Choose which days of the week you are available
- Set start and end times for each day
- Different days can have different hours (e.g., shorter hours on Friday)
Timezone#
Your availability is displayed in your account timezone. Clients booking from a different timezone see the times converted to their local time.
Booking Links#
Each appointment type has a public booking link that you can share with clients. When a client visits the link, they see:
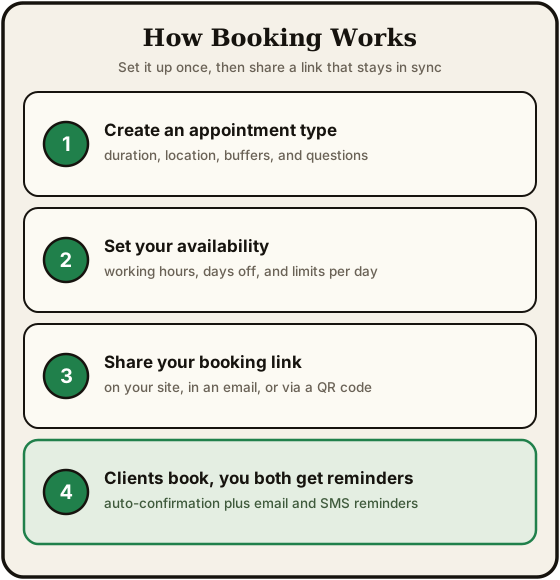
- The appointment type name and description
- Your available time slots
- A form to enter their name, email, phone, and any custom booking questions
Sharing#
Copy the booking link from the appointment type settings. You can:
- Share it directly via email or SMS
- Embed it on your website
- Include it in workflows and campaigns
The Booking Page#
The public booking page is branded with your logo and colors. Clients:
- Select an available date
- Choose a time slot
- Fill in their details
- Confirm the booking
Taking Payment for a Booking#
Put a price on a service and the booking page collects it as part of the confirmation step, through your own connected Stripe. Use it for paid consultations, deposits, and anything you would rather not chase an invoice for afterwards.
Card payments confirm immediately. The customer pays, the slot is theirs, and the confirmation goes out.
Bank payments (ACH, SEPA, Bacs) do not settle instantly. The slot is held while the payment clears, so it is not offered to anyone else in the meantime, and it is released as soon as a payment fails rather than sitting reserved against money that is never going to arrive.
Cancelling a booking closes its payment page, so a customer cannot pay for a slot that no longer exists.
A service with no price behaves exactly as it always has: the customer books, gets their confirmation, and is never sent to a payment step.
Note: paid bookings need the sub-account's Stripe connected. Until it is, put no price on the service, or the booking cannot be completed.
Appointment Lifecycle#
Appointments move through statuses:
| Status | Meaning |
|---|---|
| Booked | Client has reserved a time slot |
| Confirmed | Appointment has been confirmed (manually or automatically) |
| Completed | The appointment has taken place |
| Cancelled | The appointment was cancelled by the client or your team |
| No-show | The client did not attend |
Rescheduling an appointment moves it to a new time but does not create a separate status - the appointment keeps its current status and fires a reschedule event that can trigger workflows.
Status Changes#
Change an appointment's status from the appointment detail view or from the calendar. Status changes are logged in the contact's activity timeline and can trigger workflows.
Confirmation and Reminders#
When a client books an appointment:
- A confirmation email is sent automatically with the appointment details
- Reminder emails can be configured to send before the appointment (e.g., 24 hours before, 1 hour before)
- Cancellation and rescheduling links are included in the confirmation email
Contact Integration#
Appointments are automatically linked to contact records:
- If the client's email matches an existing contact, the appointment is added to their record
- If no match is found, a new contact is created from the booking form data
- The appointment appears in the contact's activity timeline
- Appointment events can trigger workflows (booked, confirmed, cancelled, no-show, completed)
Summary#
| Feature | Detail |
|---|---|
| Views | Day, week, and month calendar |
| Appointment types | Configurable name, duration, location, description, and color |
| Groups | Organize appointment types into categories |
| Availability | Per-day hours with timezone support |
| Booking links | Public pages branded with your logo, shareable via link or embed |
| Statuses | Booked, Confirmed, Completed, Cancelled, No-show |
| Automation | Confirmation emails, reminders, and workflow triggers on status changes |
| Contact linking | Auto-match to existing contacts or create new ones on booking |